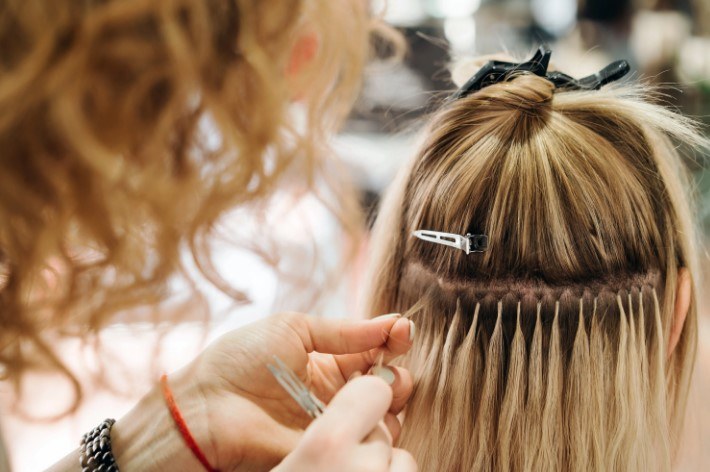


How to Highlight Hair
Contents:
- Highlighting Techniques: Which Method Works for You
- Foil Highlights
- Balayage Highlighting
- Money Pieces and Face-Frame Highlights
- How to Highlight Hair: Step-by-Step Process
- Preparation (Before You Start)
- Mixing and Preparing Lightening Product
- Application for Foil Highlights
- Application for Balayage Highlighting
- Rinsing and Neutralising
- Conditioning and Aftercare
- Cost Breakdown: DIY vs. Salon Highlighting
- Sustainable and Eco-Friendly Highlighting Options
- Common Mistakes and How to Avoid Them
- Processing Too Long
- Using 40-Volume Developer as a First-Timer
- Highlighting Dry, Previously Damaged Hair
- Skipping the Patch Test
- Not Applying Toner After Lightening
- Frequently Asked Questions
- How to highlight hair if you have very dark hair?
- Can I highlight hair that’s already been coloured?
- What if my highlights turn out too brassy or orange?
- How soon can I highlight again if I’m unhappy with the results?
- Can I highlight my hair during pregnancy?
- Moving Forward With Your Highlighted Hair
Can you achieve professional-looking highlights in your own bathroom, or does DIY hair highlighting risk the disaster you’ve heard horror stories about? The answer sits somewhere between those extremes. Learning how to highlight hair successfully requires understanding technique, choosing the right products, and approaching the process methodically. Done properly, home highlights cost approximately 60 to 70% less than salon treatments whilst delivering convincingly natural-looking results.
This guide covers everything from choosing which highlighting technique suits your hair type to step-by-step application instructions and recovery from mistakes.
Highlighting Techniques: Which Method Works for You
How to highlight hair depends first on understanding different application techniques. Each creates a distinct visual effect and requires different skill levels.
Foil Highlights
Foil highlights involve parting small sections of hair, placing them on foil, applying bleach, and folding the foil to contain the lightening process. This traditional method controls exactly where lightening occurs, making it ideal for geometric, clearly-defined highlight placement.
Advantage: Precise control, excellent for first-timers because mistakes are contained to foil-wrapped sections. Disadvantage: labour-intensive, requires 40 to 60 minutes of application time plus 30 to 45 minutes processing.
Best for: Defined, chunky highlights rather than subtle, blended effect. Works well for fine to medium hair.
Balayage Highlighting
Balayage is hand-painted highlighting without foils. The colourist (or you, in this case) applies bleach directly to hair in loose strokes, creating dimension and a sun-kissed appearance. Results look naturally highlighted rather than obviously processed.
Advantage: More forgiving than foil work because the hand-painted application creates naturally blended edges. Less precise control is actually an advantage here. Disadvantage: requires confident brush technique; mistakes appear more obviously because there’s no contained foil.
Best for: People seeking subtle, natural-looking highlights. All hair types, though works particularly well on textured or curly hair where dimension becomes more visible.
Money Pieces and Face-Frame Highlights
Highlighting only the hair framing your face, with thicker sections on either side. This subtle technique requires the least product and shortest processing time (typically 20 to 30 minutes), making it ideal for beginners.
Advantage: Minimal product needed, fast processing, extremely forgiving because mistakes are limited to highly visible but contained sections. Disadvantage: only brightens the face-framing area; doesn’t transform overall hair colour.
Best for: First-time highlighters, people with delicate or previously damaged hair, anyone seeking very subtle change.
How to Highlight Hair: Step-by-Step Process
Preparation (Before You Start)
Don’t shampoo hair for at least 48 hours before highlighting. Natural scalp oils protect your skin and hair during the bleaching process. If your hair is already clean, skip this step and proceed with slightly oily hair.
Section your hair into four to six equal parts using clips. Smaller sections (particularly for foil highlights) ensure even application. Larger sections work if you’re attempting balayage.
Conduct a patch test: apply a tiny amount of the bleach mixture to a hidden section of hair (behind the ear or under a lower section) and leave for the full processing time. If your hair breaks or feels damaged, reconsider or choose a lower-strength developer. If your scalp burns, don’t proceed with full application—consult a professional instead.
Protect your skin. Apply a barrier cream (Vaseline, barrier balm, or even coconut oil) along your hairline, ears, and neck. Wear old clothes you don’t mind staining. Have old towels ready; bleach stains permanently.
Mixing and Preparing Lightening Product
Most home highlighting kits include powder lightener and a developer. Mix according to package instructions—typically a 1:1 or 1:2 ratio. Mix in a non-metal bowl (plastic or ceramic); metal reacts with bleach.
20-volume developer is standard for most home highlighting. 30-volume developer lifts colour faster but increases damage risk. For your first highlighting, stick with 20-volume regardless of your hair darkness.
Work quickly after mixing. The bleach becomes less effective after 30 to 45 minutes once mixed. Apply within this window.
Application for Foil Highlights
Take a small section of hair (approximately pencil-width to finger-width, depending on how chunky you want highlights). Place a piece of foil underneath. Apply bleach mixture thoroughly from root to tip using an applicator brush. Fold the foil to contain it. Move to the next section.
Distribute highlights evenly across the head. If all highlights are on one side, the result looks unbalanced. Aim for roughly equal numbers of sections on each side, top and bottom of the head. Typically, 8 to 12 sections work well for noticeable but not overwhelming highlighting.
Processing time: Leave the foil in place for 30 to 45 minutes. Check one foil after 25 minutes—gently unfold and assess the lightness. When it reaches your desired shade, remove all foils immediately.
Application for Balayage Highlighting
Section hair and use an applicator brush to paint bleach onto select strands in loose, painterly strokes. Focus on mid-lengths and ends rather than roots (this creates a naturally grown-out appearance and protects delicate new growth).
Work section by section, painting strokes that follow the direction of hair growth. Vary stroke direction and placement—avoid perfectly uniform lines. The beauty of balayage is its irregularity.
Processing time: Leave for 25 to 40 minutes. Balayage typically processes faster than foils because the exposed surface area is greater. Check after 20 minutes by running your fingers through a highlighted section—if the bleach washes away easily, processing is complete.
Rinsing and Neutralising
Rinse in cool water until water runs clear. Don’t use shampoo yet—the bleach needs fully rinsing before shampooing. Rinse thoroughly; incomplete rinsing allows bleach to continue processing, causing over-lightening or damage.
Apply a toner or colour depositing treatment if desired. Toners neutralise brassy tones in blonde hair. Options include purple toner for pale blonde (reduces yellow), ash toner for medium blonde, or demi-permanent colour for darker blonde. Leave for 10 to 20 minutes, then rinse.
Shampoo twice using colour-safe shampoo and lukewarm water. The first wash removes remaining product; the second ensures complete removal.
Conditioning and Aftercare
Apply deep conditioning treatment immediately after highlighting. Bleached hair is porous and needs moisture replenishment. Leave the conditioner on for 5 to 10 minutes, then rinse thoroughly.
For the next week, use colour-safe shampoo (which is gentler) and condition every wash. Avoid heat styling. Blow-dry only if necessary, using cool or warm setting rather than hot.

Cost Breakdown: DIY vs. Salon Highlighting
Home highlighting kit (powder, developer, toner, applicator): £10 to £25. This supplies approximately three highlighting sessions before running out of product.
Cost per application: £3.50 to £8 (for approximately three uses per kit).
Deep conditioning treatment (one-time cost for immediate aftercare): £8 to £15. Use this after highlighting, then use sparingly for the next two weeks.
Total home highlighting cost (first time): £21 to £48.
Salon highlighting cost: £80 to £200 depending on length and complexity. Touch-ups every 6 to 8 weeks cost £40 to £80 per appointment. Annual salon cost (approximately 6 to 8 visits): £320 to £800.
Cost savings from home highlighting over one year: £272 to £752 if doing it yourself quarterly (approximately four applications). This calculation assumes one home kit lasts roughly 3 to 4 applications.
Sustainable and Eco-Friendly Highlighting Options
Conventional bleach powder involves chemical manufacturing and plastic packaging. More sustainable options exist.
Natural lightening methods (chamomile rinses, lemon juice, sun exposure) work gradually and create subtle lightening without permanent colour damage. These don’t technically “highlight” but create gradual brightening over weeks. Cost: approximately £1 to £3 per application. Drawback: very gradual results requiring 4 to 8 weeks for noticeable change.
Vegan and eco-conscious highlighting products now exist in the UK market. Brands like Colourful Neutral and Green Hair Care offer plant-based lightening powders using fewer harsh chemicals. Cost: £12 to £20 per kit. Performance: equivalent to conventional products with reduced environmental impact.
Reuse and recycling: Home highlighting kit containers are typically recyclable plastic or glass. Check your local council’s recycling guidelines. Some beauty suppliers (like Bare Necessities in London) accept clean beauty product containers for recycling.
Packaging-free option: Some health food shops and zero-waste retailers sell highlighting powder in bulk, allowing you to bring your own container. Cost savings are minimal (approximately £1 to £2 per kit) but environmental impact is meaningful.
Common Mistakes and How to Avoid Them
Processing Too Long
Leaving bleach on longer than recommended doesn’t create lighter blonde—it creates damaged, brittle hair. After 45 minutes, bleach stops lightening effectively and continues damaging. Set a timer. When it rings, rinse immediately regardless of whether you feel lightening is complete.
Using 40-Volume Developer as a First-Timer
Stronger developer lifts faster but significantly increases damage and breakage risk. Start with 20-volume. You can always bleach again in 2 to 3 weeks if you want lighter results; you can’t undo damage from over-processing.
Highlighting Dry, Previously Damaged Hair
Hair that’s already porous or damaged from previous bleaching, perming, or relaxing will process unpredictably. Sections might lighten unevenly, and damage risk escalates. If your hair is compromised, consider professional highlighting where they can assess condition and adjust accordingly.
Skipping the Patch Test
A 10-minute patch test prevents disasters. It assesses whether your hair will have unexpected reactions and whether your scalp is sensitive to the product. Skipping this step risks chemical burns or severe damage.
Not Applying Toner After Lightening
Blonde hair without toning often appears brassy or yellow—unflattering unless that’s intentional. Toner costs £3 to £8 and takes 15 minutes. It’s worth the extra step.
Frequently Asked Questions
How to highlight hair if you have very dark hair?
Dark hair requires 40 to 50 minutes processing time or multiple bleaching sessions for noticeable lightening. Home highlighting on very dark hair risks visible demarcation lines and uneven results. Consider starting with subtle balayage or money pieces on dark hair, which look intentional rather than patchy. If pursuing full highlights, professional application is safer for dark hair.
Can I highlight hair that’s already been coloured?
Yes, but with caution. Previously colour-treated hair is more porous and processes unpredictably. Do a thorough patch test (leave it for the full processing time, not just 10 minutes). If your coloured hair previously lifted well to lightening, it will likely do so again. If it processed unevenly before, expect similar results.
What if my highlights turn out too brassy or orange?
Purple or violet toner (applied to damp hair, left for 10 to 20 minutes) neutralises brassy tones. If brassy tone persists after toning, your hair simply hasn’t lightened enough yet. You can re-bleach in 2 to 3 weeks if desired, but this adds damage.
How soon can I highlight again if I’m unhappy with the results?
Wait at least 2 to 3 weeks before re-bleaching the same sections. Your hair needs time to recover from the first application. If you must correct highlights sooner, focus on new sections rather than re-bleaching previously highlighted hair, which risks severe breakage.
Can I highlight my hair during pregnancy?
Most health professionals consider hair highlighting safe during pregnancy because minimal product contacts the scalp and very little is absorbed. Ensure excellent ventilation (open windows, use a fan). If concerned, wait until the second trimester when foetal development is less critical. Always consult your midwife or GP if unsure.
Moving Forward With Your Highlighted Hair
How to highlight hair successfully hinges on understanding your hair type, choosing an appropriate technique, and committing to the process methodically. First-timers should start conservatively—money pieces or subtle balayage—rather than attempting dramatic full-head highlights.
Invest in colour-safe products immediately: shampoo (£6 to £10), conditioner (£8 to £12), and toner (£8 to £15). These protect your investment and maintain colour vibrancy for weeks longer than standard products.
If your first attempt doesn’t achieve perfect results, remember that highlights improve with time. Hair grows, damaged sections trim away, and future applications build on previous work. By late 2026, you’ll have developed intuition about what works for your hair and refined your technique accordingly.